Voopoo Argus P2 Pod Vape Kit Review
The latest releases from Voopoo are the Argus G2 and Argus P2. This review focuses on the Argus P2 Pod Vape Kit, as we’ve taken more of a liking to it out of the pair.
The Argus P2 device is an upgraded version of the Argus P1 device. How good is the upgrade, and is it worth getting the newer device? Let's explore and discuss all the improvements, and don’t worry - we’ll be honest with our thoughts and opinions throughout.
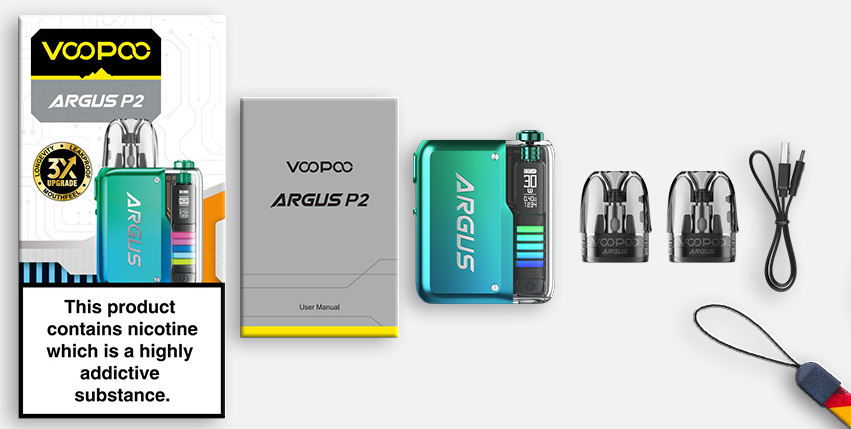
In The Box
- 1 x Argus P2 device
- 1 x 0.4Ω built-in Argus Top-Filling Pod Cartridge (2 ml)
- 1 x 0.7Ω built-in Argus Top-Filling Pod Cartridge (2 ml)
- 1 x User Manual
- 1 x Type-C Cable
- 1 x Lanyard

The box contains everything you need to start vaping immediately; you just need to grab a compatible e-liquid for your chosen pod. We’ll discuss vape juices in a second, but let's look at the device now.
The Parameters That Matter
- Battery Capacity
- 1100 mAh Built-in Battery
- Output Power
- 5W - 30W
- Charging Port
- Type-C USB
- Display Screen
- 0.54-inch OLED Screen
- Device Functions
- Power Modes, Puff Clear, On/Off Switch and Light Modes
- Device Material
- Zinc Alloy and PC
- Device Colours
- 8 Colours Available
- Pod Capacity
- 2ml
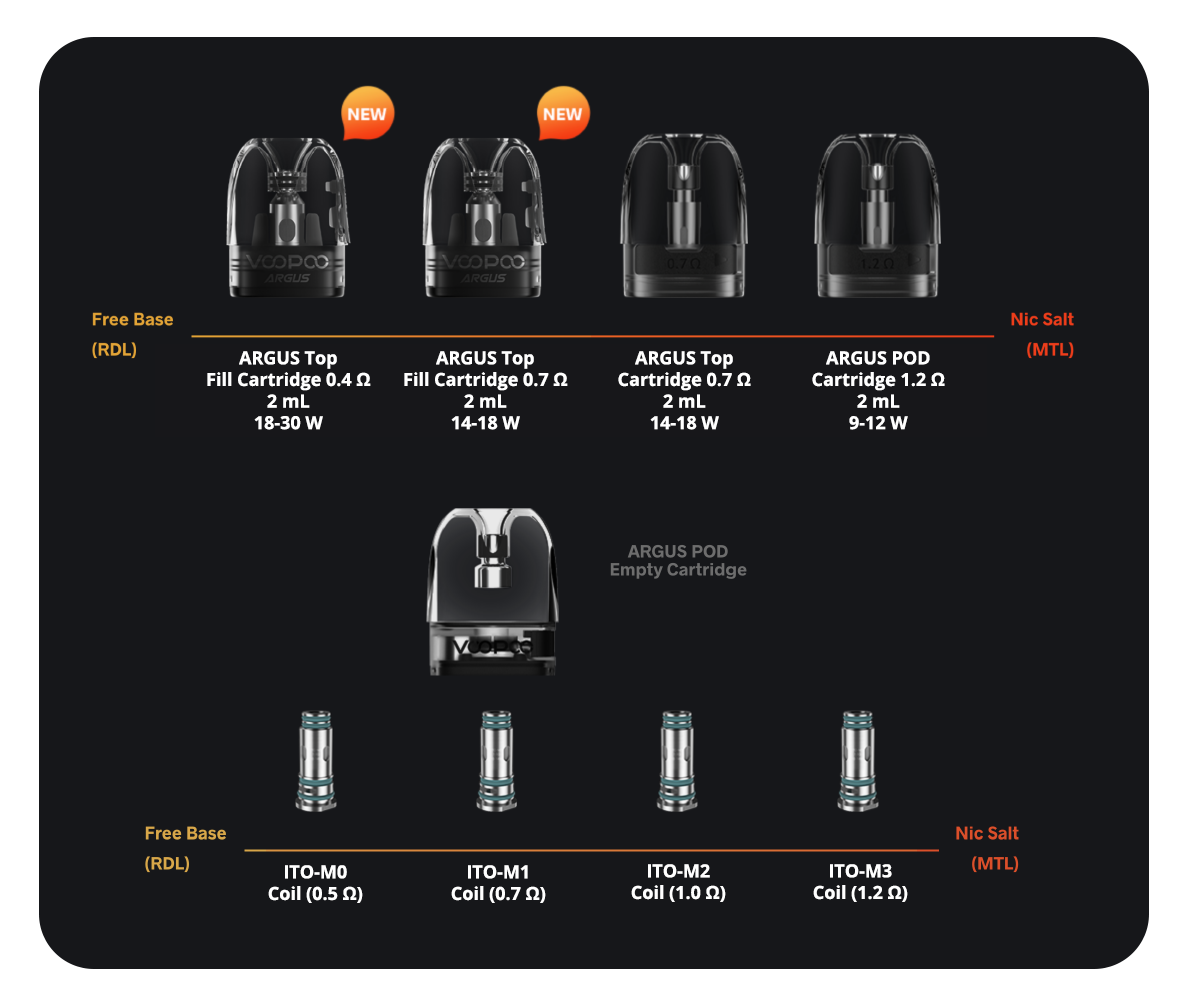
- Argus Replacement Pods
- 0.4Ω - 1.2Ω Built-in Coils
- Argus Empty Replacement Pods with ITO Coils
- 0.5Ω - 1.2Ω Replaceable Coils
From what you can see above, some upgrades from the P1 device should be apparent, like a larger battery size and a display screen that lets you customise your device to perfect every puff.


The New Look of the Argus P2
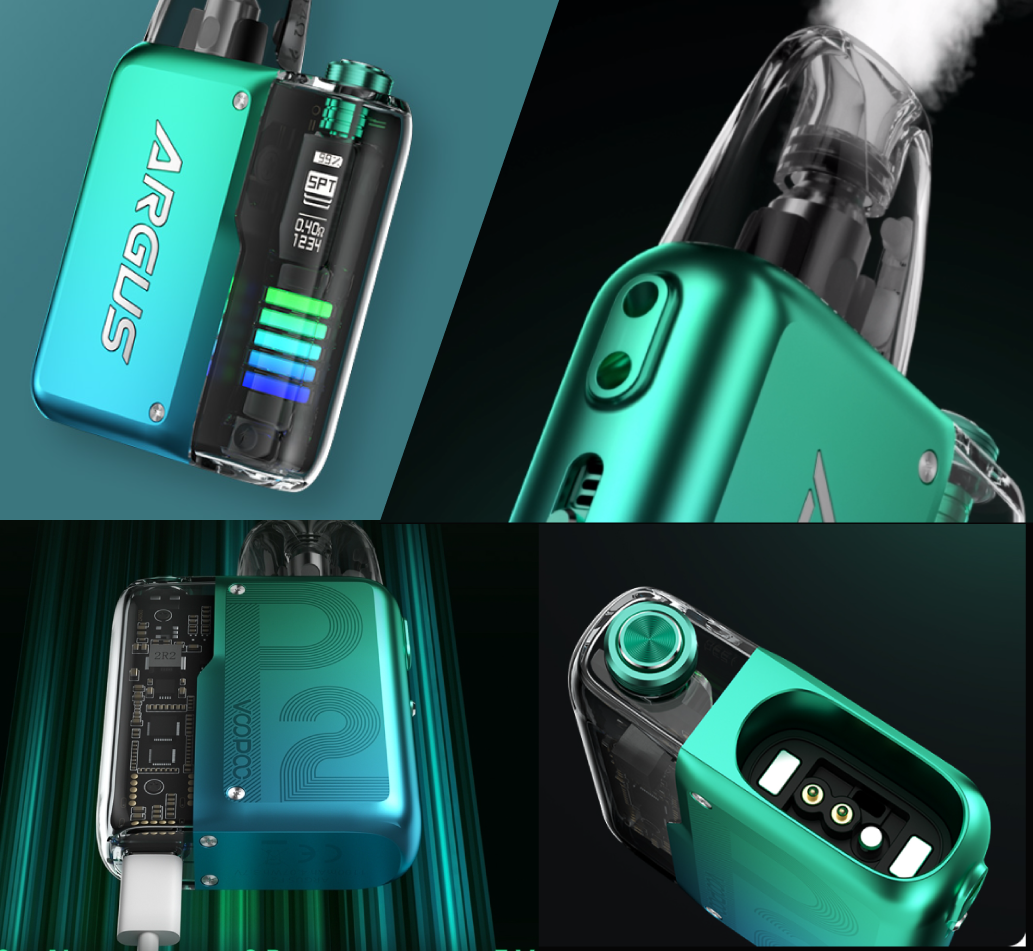
Let us start from the outside with the whole new look of the device; we keep the boxy shape and the exposed chipset. However, that is now on the back of the device as the fancy lights and the handy display screen take the front.
On the side of the device, you have the airflow control system and the lanyard hook. The airflow control system is quite firm, which is good as it won’t be sliding around unnecessarily in your pockets when you don’t want it to. The lanyard hook is just above it, which has been moved from the top of the device, but that hasn’t given us any problems, just in case that is something that you do use.
The charging port has been relocated to the bottom of the device, which is fine but could be better. The optimal place for a charging port would be on the side of the device so the kit can stand while charging, which keeps the pods from leaking and oversaturating.
A quick and simple way to avoid any pod problems while charging is to remove the pods from the device while it’s plugged in and lying on its side. And don’t worry - they won’t be out long as the battery charges extremely quickly. The display screen even shows you the waiting time until full charge! Very handy, in my opinion.
The Main Event
The brand new display screen! What a treat, honestly. But how good is it? Well, let me tell you all about it.
Unlike the Argus P1, the Argus P2 allows you to customise your vaping sessions and hone into that perfect puff you’ve been after.
First, to turn on your device, you need to make five quick clicks on the power button located right next to the mouthpiece. Then, the display screen will turn on, which is relatively small but still very clear and easy to read.
At first glance, your screen will show four main sections: the battery charge, the power mode, the coil resistance, and a handy puff counter. Now, let me explain what you can do with the device and how to do it.
When the device is on, you can access the settings menu by pressing the power button five times. You can clear your puffs, change the power mode, turn your device off, or exit the menu screen. Other than the power setting, you don’t need to worry about anything else; all the other information, like the battery charge and the puff counter, is there to help you.


Various Power Settings
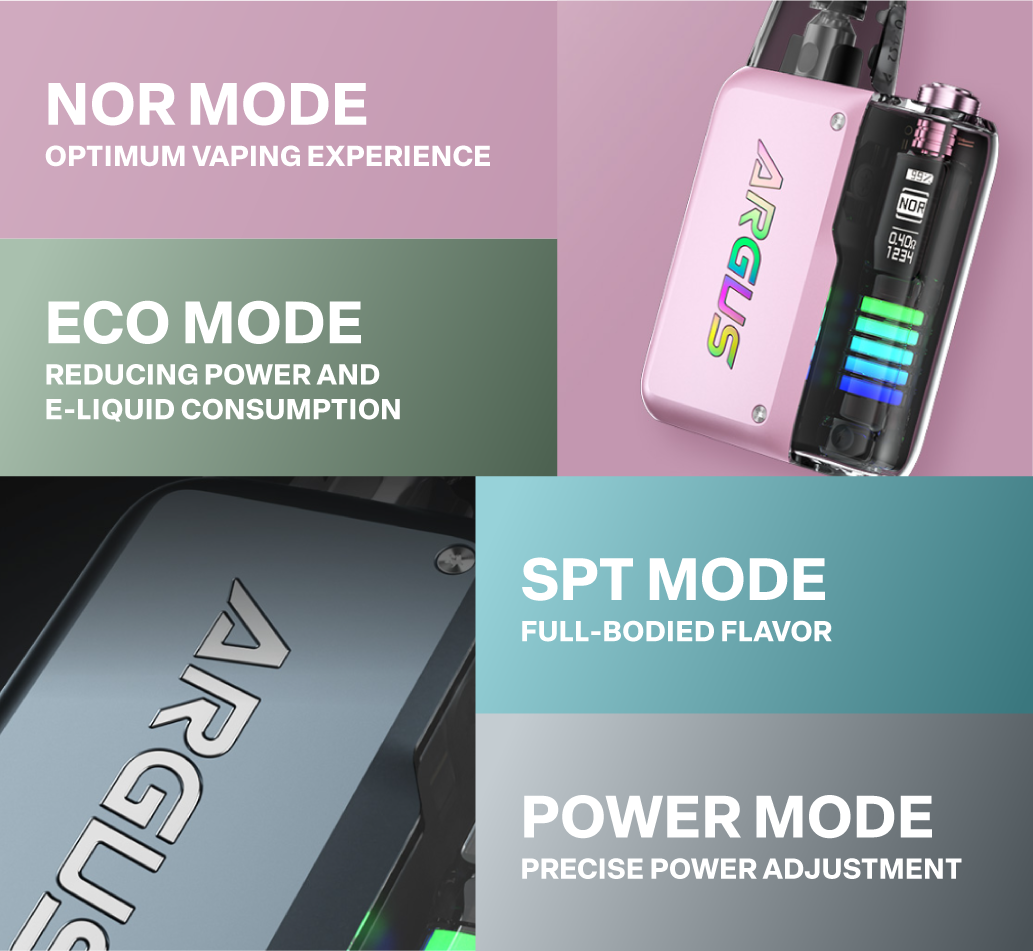
With four different power settings, you should have no problem customising each puff to your liking. Set the airflow system to the right level, match that with your preferred power setting, and you’re set for the best vaping session.
Power Mode
The first power mode, conveniently called ‘power mode,’ is where you can adjust the device's wattage output yourself. After three clicks on the power button, the wattage level will pulse, and then you can click the power button again to increase the wattage level in single increments until you reach the maximum level.
With the 1100 mAh battery, the device can go up to 30W! However, there are specific limits for each coil resistance; for example, with a 1.2Ω coil, you can only choose a wattage level between 5W and 12W. This isn’t bad; the device simply helps you avoid burning out your coils by setting a maximum output power per coil.
For those looking to use all 30W available, the new 0.4Ω coil is the best choice, as it will deliver some powerful RDL vaping. I would also recommend using a low-strength 50/50 - 60/40 VG/PG liquid with coils in that range.
Shift Mode
I tend to use the shift mode, which is the better option for those not entirely confident with wattage adjustment. This mode allows you to choose between three power outputs for a simpler vaping experience. You can quickly change between the modes with three clicks on the power button, and the screen will display your current setting.
SPT mode, or 'sport mode' as I call it, sets the device to the highest possible power output optimal for the current coil. Use this mode to achieve robust flavours and voluminous clouds.
NOR mode, or normal mode, is the middle ground. This mode sets the device to a standard power output, which is excellent for day-to-day vaping. It allows for great flavour and vapour without draining your battery too quickly.
Finally, ECO mode keeps the power output to a minimum to save on battery level. This doesn’t mean that the flavours will be less noticeable or that less vapour will be created, but it’s there so that even on a low charge, you can enjoy vaping without worrying too much about your device shutting off mid-puff.
With shift mode, you can quickly change between power outputs without setting a specific wattage output. You can change to SPT for when you need a good hit or ECO when your charge is nearing the end. I appreciate this feature as it’s easy for a beginner to get used to, but it also allows them to customise their vaping sessions and try new things.
Bright Colourful Lights
What’s a vape without some colourful LED lights these days? The light bars below the screen add a bit of flair to your vape; they can glitter bright colours while you vape, be a clean white to indicate the battery level or be turned off to be more discreet.
The choice is up to you, but I like to keep mine on the white option to match the white colour of the device. Hold the power button for around 2-3 seconds to change between the colour options, and the display screen will tell you which option you’ve switched to.
Vaping Performance
Now that we have all the fancy stuff out of the way let's get to the vaping part. How does it perform, and how can we achieve the best hit?
I’ve been using the new top-fill 0.7Ω VooPoo Argus Replacement Pod Cartridges, which has been a smooth ride. It's perfect for MTL/RDL vaping, with plenty of flavours and vapour. I like to leave the airflow system open to take longer, airier hits. Using the device has been a treat, and the battery lasts ages, even in SPT Mode and Power Mode.
Of course, you can choose any coil option between 0.4Ω and 1.2Ω. However, they come in different pod styles.


Depending on your experience and preferences, you can choose a top-filling or side-filling pod with built-in or replaceable coils to use with the Argus P2. The new 0.4Ω and 0.7Ω top-filling pods with built-in coils are included in the box, but they are for different vape styles.
For an MTL vaping experience, I would recommend using 0.7Ω and above, and for RDL vaping, anything below will do just fine.
As for e-liquids, I recommend either nicotine salts or freebase nicotine. They are both perfectly matched for any of the coil options; the choice is yours.
I’ve been using various Vape UK Bar Salts E-Liquids, which come in plenty of fruity and menthol flavours perfect for this little kit and the 1.2Ω coils. They have fantastic flavour output with good clouds, and the battery is good to go for days on a single charge.
Final Opinions
I applaud Voopoo for this impressive upgrade, and if you’re a regular vaper looking for an upgrade, I think this is 100% worth it. With a larger battery that lasts ages and a screen display, the device offers much more than its predecessor.
Even if you’re looking for your first vape kit, this is a device that can grow with you and last you a long time; plenty of coil options with the choice to switch between MTL and RDL vaping, the ability to change between Shift Mode and Power Mode and the compatibility with such a wide range of e-liquids.
If this kit isn’t to your liking, no worries. We have plenty of other pod vape kits in our catalogue ready for you to check out. Better yet, why not check out our Oxva Xlim V2 & Xlim Pro Pod Kit Review to learn more about some different styles of pod kits or check out our list of The Best MTL Pod Vape Starter Kits for 2024?